
Help center › Getting started
Getting started
Creating an account, the setup wizard, required hardware and pairing POS, waiter and kitchen devices.
Siparo runs in the browser; there is nothing to install. When you finish the steps on this page, you are ready for your first sale.
What you need
| What | Required? | Note |
|---|---|---|
| Windows computer + Chrome or Edge | Yes | Used as the POS. A touchscreen is optional. |
| Internet | Yes (for setup) | If it drops during service, the POS keeps working. |
| Second monitor | No | For the customer display. |
| 80 mm thermal printer | No | For receipts and kitchen tickets. Set it as the default printer in Windows. |
| Cash drawer, barcode scanner | No | Connect to the printer / USB. |
| Phone or tablet | No | For the waiter app and the kitchen display. |
Creating an account
- On siparo.net, click Try it free.
- Enter your name, business name, email, phone and a password; choose your business type (café, restaurant, burger, bar).
- If you have a promo code, enter it under Have a promo code?.
- Click Create my account. All features are unlocked for 14 days; no credit card is required.
Setup wizard
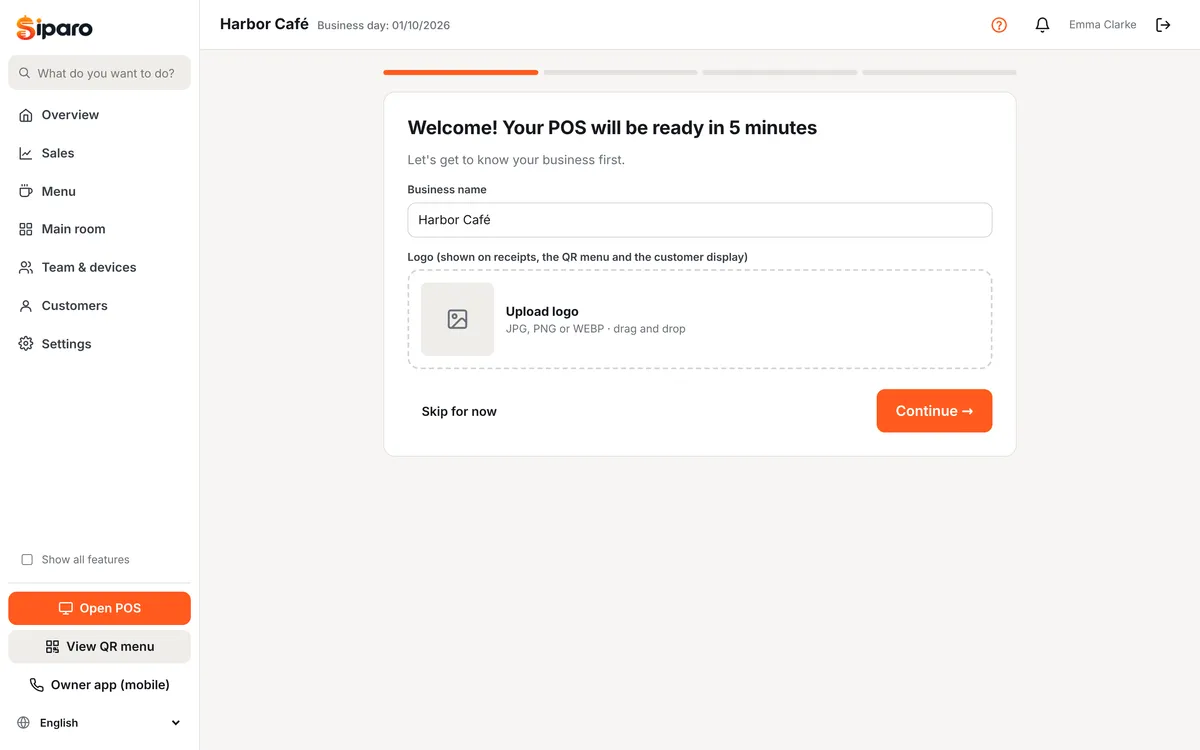
After signing up, the dashboard takes you through a 4-step wizard:
- Business: check your name and logo (the logo appears on receipts, the QR menu and the customer display).
- Menu: start with a sample menu. You can edit prices and products later.
- Tables: enter your number of tables. Enter 0 if you only do takeaway.
- All set: make this computer the POS with one click, or press Start the short tour to get to know the dashboard.
Finding your way around
The left menu has seven items. Open one and its pages appear as tabs at the top of the screen.
| Item | Contains |
|---|---|
| Overview | Today's sales, open tables, first steps |
| Sales | Reports, end of day (Z) archive |
| Menu | Products and prices, option groups, stock |
| Main room | Tables, QR menu, reservations |
| Team & devices | Staff and PINs, device pairing, customer display, printers, training |
| Customers | Customer accounts, expenses |
| Settings | Business details, payment methods, subscription |
- Can't find a page? Type in What do you want to do? at the top of the menu, e.g. "change price", "add table", "printer", "end of day".
- Rarely used pages (report builder, activity log, branches, expenses, API, fiscal printer) are hidden in the simple view. Tick Show all features at the bottom of the menu to see them.
- The First steps card on the Overview page shows what is left to set up; until your first sale a green dot appears next to the related item.
Pairing devices
Each POS, waiter phone and kitchen display is paired once. The pairing is stored in the device's browser; you don't repeat it every day.
To make this computer the POS: on the computer where you are logged in to the dashboard, click Open POS or type /pos in the address bar. This browser is paired as the POS automatically, no code needed. The same works for a waiter phone or kitchen tablet: log in to the dashboard on that device and open /garson or /kds.
To pair without logging in (an employee's phone, a tablet, a second POS):
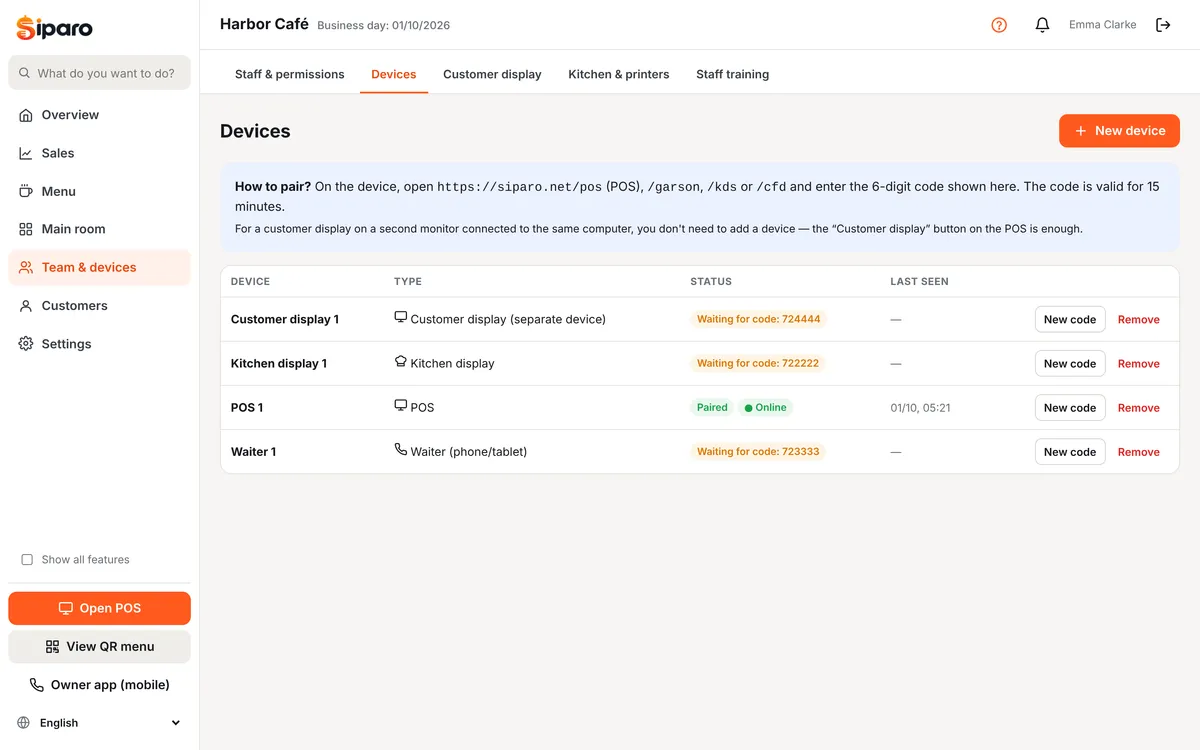
- Dashboard → Team & devices → Devices → New device. Choose the type: POS, waiter, kitchen display or customer display.
- A 6-digit code appears. It is valid for 15 minutes and can be used once.
- On the device, open the browser and go to
siparo.net/posfor a POS,/garsonfor a waiter,/kdsfor the kitchen and/cfdfor a customer display. - Enter the code. The device shows as "Paired" in the Devices list.
Staff login (PIN)
PIN login is optional and starts switched off for new accounts. While it's off, the POS, waiter and kitchen screens open directly with the account logged in to the dashboard (otherwise the business owner) — the fastest option for owner-operated businesses.
If you have several employees, we recommend turning it on: Dashboard → Settings → Business settings → POS & checks → Staff PIN login. Give yourself a PIN first. While it's on, each employee taps their name and enters their 4-digit PIN; every action is recorded under that person and discount and void permissions apply. When leaving the POS, press Lock (Ctrl+L); the POS also locks itself after a period of inactivity.
To assign PINs and permissions: Staff and permissions.
Staff training
Dashboard → Team & devices → Staff training has printable cashier, waiter and kitchen cards, short training videos and a button to reset the tours. On the POS, the waiter app and the kitchen display, a step-by-step tour opens automatically at first login and can be replayed with the ? button on each screen.